Posts by Adrian

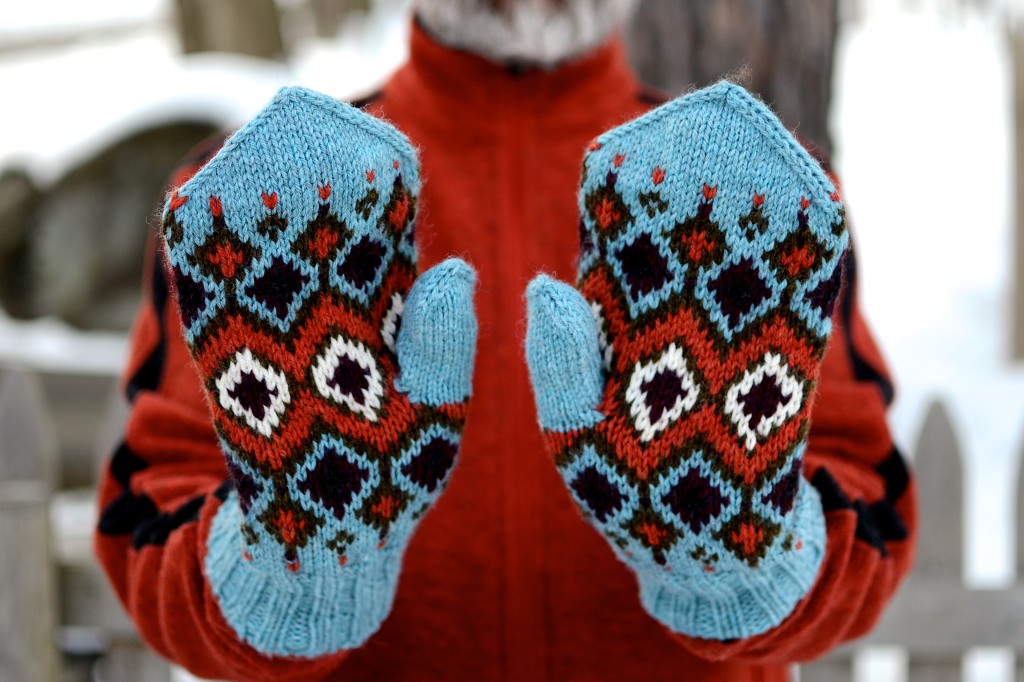
New Pattern: Hickory Mittens

I designed a new mitten!

Blue Hickory Mittens

The Facts:
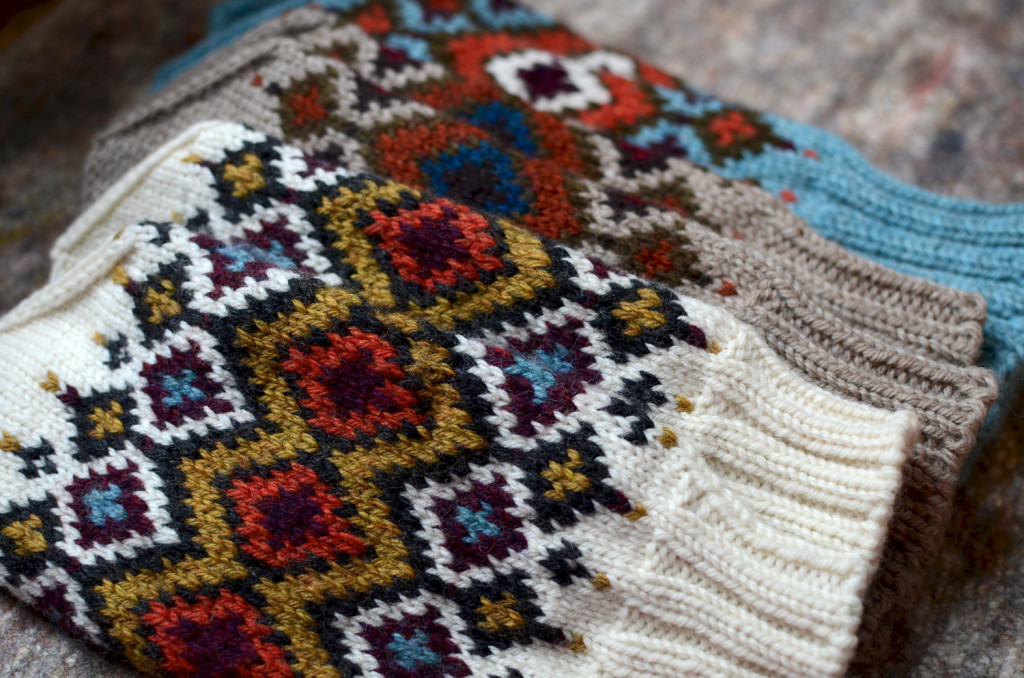
Yarn: Cascade 220 solids and heathers
Pattern: Hickory Mittens (straight to Ravelry with you!)
Needles: size 3, 4, or 5 US or size needed to get gauge
Gauge: 28 (26, 24) stitches and 28 (26, 24) rows = 4” [10cm] in colorwork pattern. Finished mitten size is determined by gauge/needle.
Size: Unisex adult S (M, L)

hickorymittens2

The Yarn:
I used Cascade 220 for these because it’s a fantastic sturdy yarn for mittens and because chances are, you have some of it laying around.  The motif outlining only requires 50 yards and all the contrast colors less than 40 yards, so chances are, you can find the yarn in your stash or you’d only need to buy the main color skein.

The Chart:
The chart for these mittens is in black and white, using symbols for the colors, which means that if you have a set of markers or colored pencils, you can have a grand old time coloring in the chart and testing color combinations.
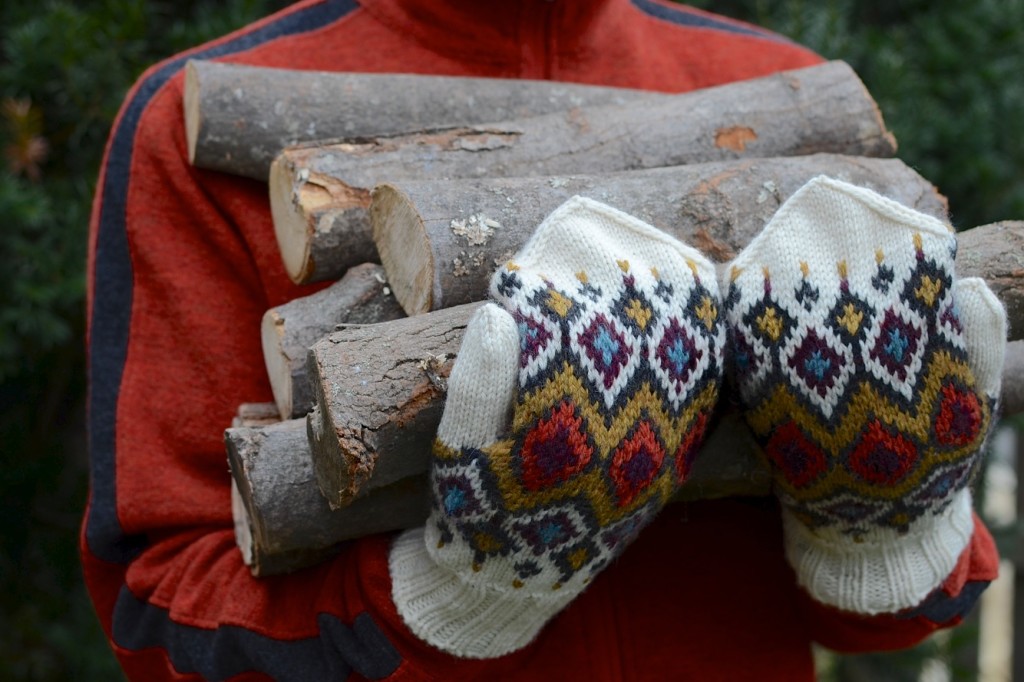
The Knitting:
It’s a little bit of a challenge, and a whole lot of fun.  There are up to four colors per round, which means they’re not a good first colorwork pattern.  That said, if you can strand two colors, you can do four.  It just requires a little organization of balls or butterflies (check out this video) of yarn. Take special care to make nice loose floats and you’re good to go.

all hickory mittens

No Lining:
For once, there’s no lining!  These mittens don’t need it.  They’re plenty puffy and warm with all the stranding that’s going on inside.

Thanks, everyone! Let me know if you have any questions that aren’t addressed on the info page.

1 Comment

Meyer Lemon Curd and Thyme Cupcakes

Meyer Lemon Curd and Thyme Cupcakes

These are really fresh-tasting, tart, and delicious.

I used 4 Meyer lemons for this recipe, but you may need more or fewer.  This would be fine with regular lemons, as there’s plenty of sugar to go around in this recipe.

This recipe is cobbled together from many others.  Special thanks to Local Kitchen for teaching me to make curd in the first place.

Meyer Lemon Curd and Thyme Cupcakes
makes 24 cupcakes

To start:

Zest and squeeze 4 Meyer lemons.  You might need more, but this is a good starting point.

For the cakes:

  • 2 cups heavy cream
  • 2 cups granulated sugar
  • 2 eggs, lightly beaten
  • 3 cups self-rising flour (Don’t have any?  Google and there are tons of recipes.)
  • 1/4 of the zest

1. Preheat oven to 350F. Line muffin pans with 24 cupcake papers.

2. Place cream, sugar and eggs in a large mixing bowl and whisk until smooth. Gradually add flour and zest and continue whisking until the mixture is smooth.

3. Divide mixture between prepared liners and bake for 20 minutes or until cakes are lightly browned and spring back when gently poked. Cool thoroughly.

For the curd:

  • 1/2 cup Meyer lemon juice, plus half the zest
  • 1 large egg + 1 egg yolk
  • 1/2 cup sugar
  • 4 Tbsp. butter, cut up
  • pinch salt
  1. Place the zest in a heatproof bowl with a fine strainer over it.
  2. In a small, heavy-bottomed saucepan whisk together the juice, eggs, sugar and salt. Add butter and cook over medium-low heat, stirring constantly with a wooden spoon, until the foam subsides and the curd is thick enough to heavily coat the back of the spoon, about 10 – 15 minutes.  Don’t let it boil.
  3. Pour the curd through the strainer into the bowl with the zest, pressing curd through the strainer. Scrape any curd from the underside of the strainer into bowl and stir gently to incorporate zest. Refrigerate for a couple of hours to set.

Assemble:

  1. “Core” your cooled cupcakes.  I used an apple corer and went about 3/4 of the way down.  I took the crusty top off the core and reserved it to plug the hole.  Those cores are your snacky reward for all of this hard work.
  2. Put the cold curd in a piping bag or a Ziploc bag with the corner snipped off and fill the cupcakes, leaving a bit of space at the top so that when you plug the hole, it’s level with the top of the cupcake. Core, fill, and plug them all.

Icing:

  • 2 Tbsp. sour cream
  • 2 Tbsp. Meyer lemon juice, plus 1/4 of the zest
  • 2 tsp. packed fresh thyme leaves, separated
  • pinch of salt
  • 2 cups confectioners sugar
  1.  Whisk the sour cream, lemon juice, zest, 1 tsp. thyme, and salt together until smooth.  Whisk in sugar until smooth.
  2. Let sit 10 minutes until it firms up a bit.
Final assembly:
  1. Place cupcakes on a rack and spoon icing on top.  Garnish with more fresh thyme leaves.
  2. Let icing set for 30 minutes and serve.
3 Comments

Handspun Baby Clothes

Handspun Outfit of Wooliness

I love it when a fellow wool person has a baby and I can make hand washable baby clothes without worrying that they won’t be loved.  In my book, there’s really nothing better than a fat baby tummy covered in smushy wool, so cover babies’ tummies I do.

I can’t say enough good things about these overalls.  I mean, could they BE any sweeter?  The pattern is clear and simple and the end product is a delight.  After I made these, I was shown a blog post about knitting a crotch gusset, which can only be a good addition, when one considers how much diaper sits in between a baby’s legs.  The more room there, the better.  These are knit at a pretty loose gauge, though, so the fabric is plenty stretchy to function well as written, I suspect.

Handspun Baby Overalls

Patterns: On the Go-veralls and Top Down Bonnet
Yarn: worsted weight 2 ply, 8 oz. and 558 yards- half the skein made both the pants and bonnet
Needles: US size 7 for the overalls and 3 for the bonnet
Size: I made the 6-12 month size in the overalls, but a bit stubby. They’re 16″ tall, including straps. SO TINY.  I made the baby size in the bonnet.

Handspun Patchwork Yarn

I’m really pleased with the random coloring of this yarn. It’s made from scraps of at least 4 different colorways of Hello Yarn fiber.  One ply is super soft stuff like Merino and Rambouillet, and the other is stronger stuff like Falkland wool and Corriedale.  I chose the fibers based on color and had no problems with the combination of breeds. I figured if the shorter fibers puffed up, that ply would just be chubbier.  The yarn was finished gently, with just a soak in lukewarm water and no agitation.  I spun and plied it it a bit loosely, hoping for a light and puffy yarn, which was the result.  The fact that I got a whole pair of overalls and a bonnet out of 4 oz. attests to that!

Handspun Baby Overalls

Oh, hey, and there’s a whole new website!  I’ve tried to move all the important stuff over from the old one, but I did ditch my blog posts from before 2007, as it really wasn’t that interesting back then and I doubt anyone ever looked.  If you notice something that you loved is missing, let me know!  Something happened to the blog categories (as in, they didn’t make the transfer).  I’ll work on that.  All the patterns you used to be able to download from my site are now available only on Ravelry.  You can access them through the Pattern menu above.  It seemed redundant to host them here as well as Ravelry and an informal Twitter poll indicated that pretty much everyone thinks that is exactly what Ravelry is for.

I plan on blogging a whole bunch, including about the building of our new studio.  If you’d like to read about it, you can update your RSS feeds over in the sidebar.

5 Comments